Creating your own floating candles can be a rewarding and creative project. Not only do they add a touch of elegance to any setting, but they also offer a unique way to enhance ambiance for special occasions. In this comprehensive guide, we’ll delve into the process of making floating candles from scratch, providing detailed instructions and tips to help you achieve a beautiful glow.
Understanding Floating Candles
What Are Floating Candles?
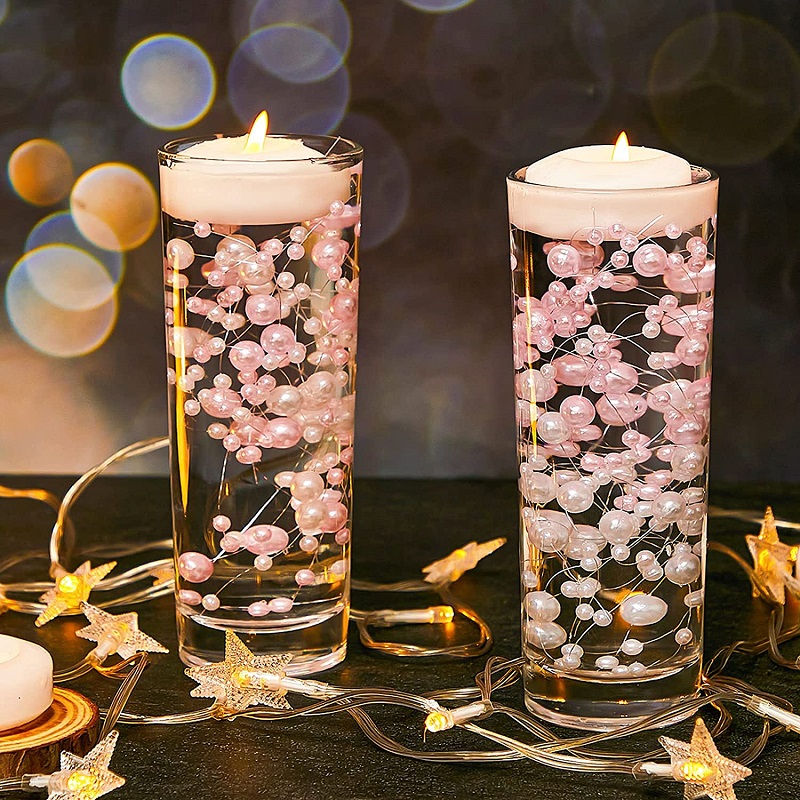
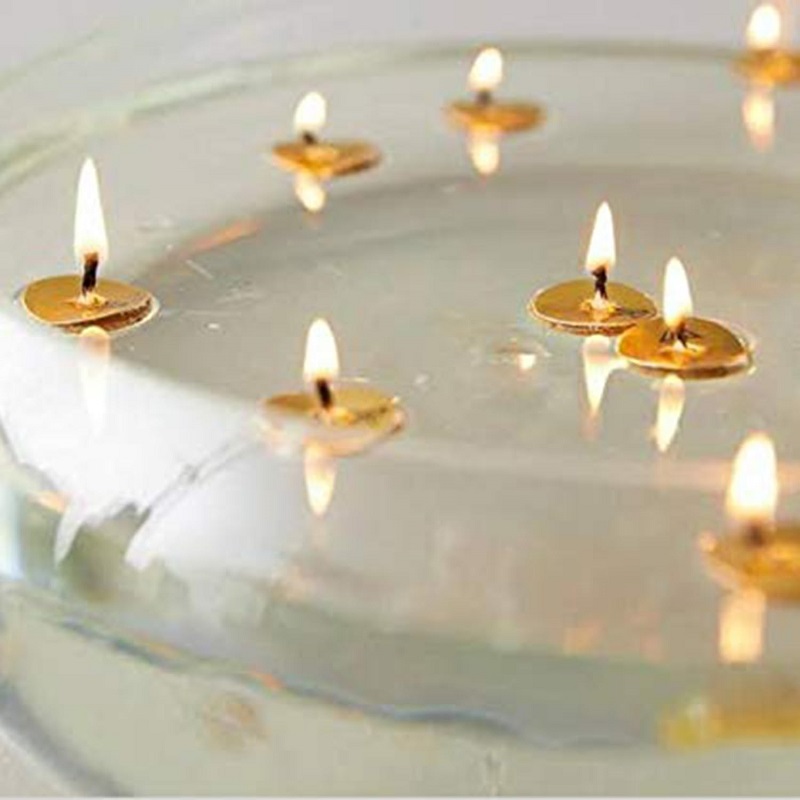
Floating candles are a type of candle designed to rest on the surface of water, creating a captivating visual effect. Typically round or cylindrical, they are buoyant and can be used in various decorative settings such as centerpieces for weddings, parties, or romantic dinners. The gentle flicker of the candlelight reflected on the water adds a serene and enchanting quality to any environment.
Why Make Your Own Floating Candles?
Making your own floating candles allows for complete customization in terms of color, scent, and design. Store-bought candles may not always match your specific theme or preferences. By crafting them yourself, you can tailor every detail to suit your needs, ensuring a unique and personal touch. Additionally, DIY projects can be more cost-effective than purchasing pre-made options, making it a practical choice for those who enjoy hands-on activities.
Materials and Tools Needed
Essential Supplies
To start making floating candles, you’ll need several key materials. These include wax (such as paraffin, soy, or beeswax), wick, a double boiler for melting the wax, a thermometer, a stirring utensil, and mold(s). If you want to add color or fragrance, you’ll need dye and essential oils. For the molds, you can use special floating candle molds or repurpose items like plastic cups.
Additional Tools and Equipment
Besides the basic supplies, some additional tools will make the process smoother. A heat-resistant container for mixing and pouring wax, wick stickers or glue dots to secure the wick, and a pair of scissors for trimming the wick are also helpful. It’s important to have a clean and well-ventilated workspace to ensure safety and efficiency during the candle-making process.
Step-by-Step Instructions for Making Floating Candles
Melting the Wax
Begin by melting your wax using a double boiler. This method ensures that the wax melts evenly and prevents burning. Fill the bottom pot of the double boiler with water and bring it to a simmer. Place the wax in the top pot and stir occasionally until it reaches a temperature of 170-180°F (77-82°C). Use a thermometer to monitor the temperature closely, as overheating the wax can cause it to become discolored or lose its scent.
Adding Color and Fragrance
Once the wax is fully melted, you can add color and fragrance if desired. For color, add wax dye or crayon shavings in small amounts, stirring thoroughly to achieve the desired hue. For fragrance, add essential oils or fragrance oils, following the manufacturer’s recommendations for the appropriate amount. Stir well to ensure an even distribution of color and scent throughout the wax.
Preparing the Molds and Wicks
While the wax is melting, prepare your molds and wicks. If you’re using a specific floating candle mold, make sure it’s clean and dry. Secure the wick in the center of the mold using wick stickers or glue dots. Ensure the wick is centered and upright to prevent uneven burning. If you’re using repurposed molds, ensure they are watertight and suited for floating candles.
Pouring the Wax
Carefully pour the melted wax into the prepared molds, filling them to just below the rim. To avoid bubbles, pour slowly and steadily. Leave a small amount of wax in the pot for topping off the candles later, as the wax may shrink as it cools. Allow the wax to cool and harden completely before removing the candles from the molds.
Finishing Touches
Once the candles have hardened, trim the wick to about 1/4 inch (0.6 cm) above the surface of the candle. This length ensures a steady, controlled flame. If necessary, reheat and pour the reserved wax over any imperfections or gaps in the surface. Allow the candles to set fully before using or displaying them.
Tips for Successful Floating Candles
Choosing the Right Wax
Selecting the right type of wax is crucial for the success of your floating candles. Paraffin wax is commonly used due to its smooth finish and ease of use, while soy wax offers a more eco-friendly alternative. Beeswax is another option, known for its natural honey scent and high-quality burn. Each type of wax has its own melting point and characteristics, so choose one that aligns with your project needs.
Avoiding Common Mistakes
To ensure the best results, avoid common mistakes such as overheating the wax, which can cause discoloration or uneven burning. Make sure to stir the wax gently to avoid introducing air bubbles. Additionally, ensure that your molds are clean and free from any residues that might affect the final appearance of your candles. Taking these precautions will help you achieve a smooth, professional-looking finish.
Experimenting with Shapes and Sizes
Don’t be afraid to experiment with different shapes and sizes for your floating candles. While round and cylindrical candles are traditional, you can use various molds to create unique designs. For example, star-shaped or heart-shaped candles can add a personalized touch to your decor. Explore different mold options and sizes to create candles that perfectly match your event or setting.
Creative Ideas for Using Floating Candles
Decorative Centerpieces
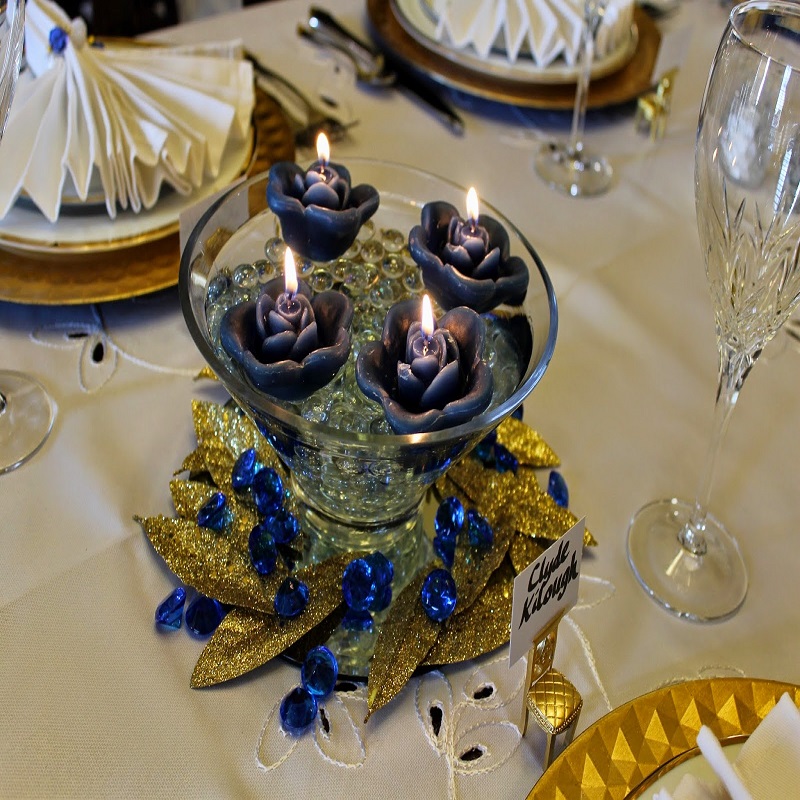
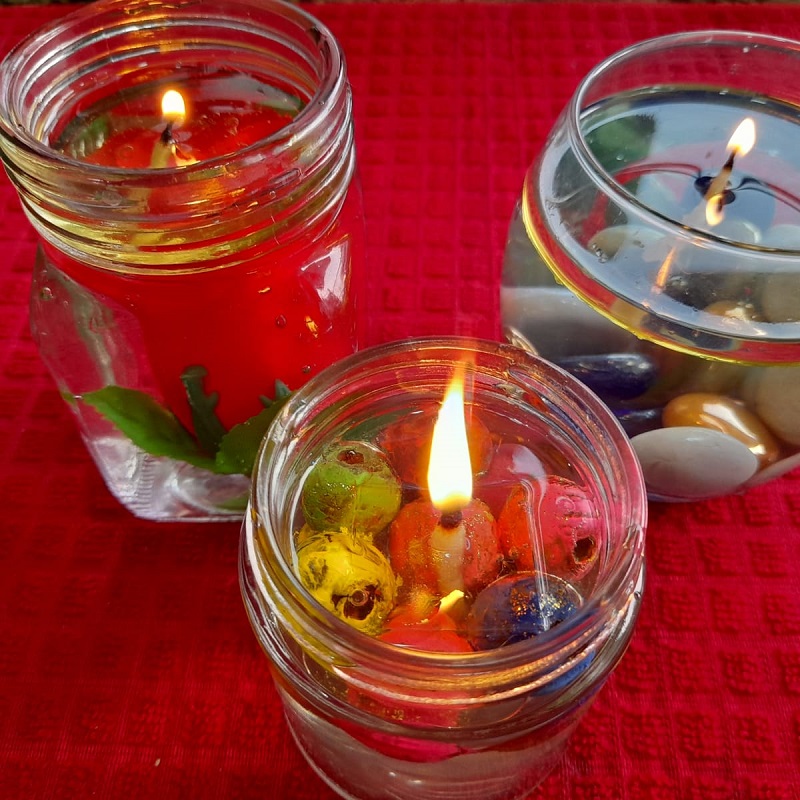
Floating candles make stunning centerpieces for a variety of occasions. Fill a large glass bowl or vase with water and arrange the candles on the surface. You can add decorative elements such as flower petals, colored stones, or floating rose buds to enhance the visual appeal. This setup creates a captivating and elegant display that will impress your guests.
Romantic Atmosphere
For a romantic dinner or special evening, floating candles can set the perfect mood. Arrange them in a bath or small decorative containers filled with water, and add a few drops of essential oils for a soothing fragrance. The gentle flicker of the candles combined with the reflection on the water creates a serene and intimate atmosphere.
Seasonal and Holiday Decor
Floating candles can also be used for seasonal and holiday decor. For example, during the winter holidays, you can create a winter wonderland effect by adding faux snow and small pinecones around your candles. For summer events, use bright colors and floral accents to match the season. Tailor your candle designs to suit different themes and celebrations throughout the year.
Safety Considerations and Precautions
Fire Safety
Safety is paramount when working with candles. Never leave burning candles unattended, and always place them on a heat-resistant surface. Ensure that floating candles are used in a secure and stable container to prevent tipping. Keep candles away from flammable materials and out of reach of children and pets. Following these safety guidelines will help prevent accidents and ensure a safe experience.
Proper Disposal and Recycling
After the candles have been used, dispose of or recycle them properly. If the candles are made from paraffin wax, check with your local recycling center for appropriate disposal methods. For soy or beeswax candles, these materials are often biodegradable and can be composted. Proper disposal helps reduce environmental impact and supports sustainable practices.
Conclusion
Embrace the Art of Candle Making
Making floating candles is a rewarding craft that allows for creativity and personalization. By following the steps outlined in this guide, you can create beautiful and unique candles that add a touch of elegance to any setting. Embrace the art of candle making and experiment with different designs and techniques to enhance your home decor or special events. With a little practice and patience, you’ll master the art of creating stunning floating candles that illuminate any occasion with a beautiful glow.