Creating a beautiful and inviting atmosphere in your home often revolves around the little details. One such detail that can significantly enhance your decor is the way you present candles. Candles not only provide light but also add warmth and personality to any space. One innovative way to elevate your candle decor is by painting them with wax. This guide will walk you through the steps of transforming plain candles into stunning decorative pieces using wax paint.
Understanding the Basics of Candle Painting
What is Candle Painting?
Candle painting is an artistic technique that involves applying colored wax to the surface of a candle, allowing for creativity and personalization. This process not only beautifies the candles but also enhances their uniqueness, making them excellent gifts or decorative items for special occasions. The wax used in painting ensures that the design adheres well and maintains its vibrancy even when the candle is lit.
Why Choose Wax for Painting?
Using wax for painting candles is advantageous for several reasons. First, wax is inherently designed to withstand heat, making it ideal for candle applications. Traditional paints may melt or emit harmful fumes when heated, while wax remains stable. Furthermore, wax paints offer a rich texture and depth of color that can bring your designs to life. They also create a smooth finish that feels luxurious to the touch.
Gathering Your Materials
Essential Supplies for Candle Painting
Before diving into the creative process, it’s important to gather all necessary materials. You will need plain candles (preferably pillar or votive candles), wax crayons or specialty wax paints, a double boiler or microwave-safe container, a paintbrush or sponge applicator, and parchment paper. Additionally, having a heat source like a stovetop or microwave will be essential for melting the wax.
Choosing the Right Candles
When selecting candles for your painting project, consider the type and color of the base candles. White or light-colored candles work best as they provide a neutral backdrop that allows the colors to pop. Avoid heavily textured candles, as this can make it difficult for the wax paint to adhere properly. Pillar candles are preferred because of their sturdy shape and longer burn time, but taper and votive candles can also be used for smaller projects.
Preparing Your Workspace
Setting Up a Clean Area
Creating a designated workspace is crucial for a successful candle painting project. Choose a flat, clean surface in a well-ventilated area to avoid inhaling any fumes from melting wax. Cover the workspace with newspaper or a plastic sheet to protect it from spills and stains. Ensure you have all your materials within reach to streamline the process.
Safety Precautions to Consider
Safety should always be a priority when working with heat and wax. Wear protective gloves to prevent burns and keep any flammable materials away from your workspace. If you’re using a stovetop, ensure that children and pets are not nearby. Additionally, be cautious when melting wax, as overheating can cause it to smoke or catch fire. Always monitor the melting process closely.
Melting the Wax
Techniques for Melting Wax
There are various methods to melt wax for painting. The double boiler method is the most common and safest approach. Fill the bottom pot with water and place it on the stove over medium heat. In the top pot, place your wax crayons or wax paint. Stir occasionally until fully melted. Alternatively, you can use a microwave-safe container, heating the wax in short intervals to prevent overheating.
Achieving the Right Consistency
The ideal consistency for your melted wax should be smooth and pourable but not too runny. If the wax is too thick, it will not spread evenly on the candle. Conversely, if it’s too thin, it may drip off. Adjust the consistency by adding small amounts of wax at a time, stirring thoroughly. Once you achieve the desired thickness, it’s time to paint.
Applying the Wax Paint
Techniques for Painting Candles
Now that your wax is ready, it’s time to get creative. Use a paintbrush or sponge applicator to apply the melted wax to the surface of the candle. You can create different designs, such as stripes, dots, or abstract patterns. For more intricate designs, consider using stencils or rubber stamps to guide your painting process.
Layering Colors for Depth
One of the beauties of painting with wax is the ability to layer colors for added depth. After applying the first layer of wax, allow it to cool slightly before adding another color. This technique creates a rich texture and prevents colors from blending too much. Experiment with different color combinations to achieve the look you desire.
Creating Unique Designs
Exploring Different Patterns and Styles
When it comes to designing your painted candles, the possibilities are endless. From floral motifs to geometric shapes, explore various styles that resonate with your personal taste. You can also incorporate seasonal themes, such as autumn leaves or winter snowflakes, to make your candles suitable for different occasions.
Personalizing Your Candles
Adding personal touches can make your candles even more special. Consider writing initials, quotes, or dates using the wax paint. This technique is especially meaningful for gifts, as it shows thoughtfulness and care. You can also match the colors and designs to your home decor or event theme for a cohesive look.

Allowing the Wax to Set
Cooling and Hardening the Wax
Once you’ve finished painting your candles, it’s important to let the wax set properly. Place the painted candles in a cool, dry area, away from direct sunlight and heat sources. Allow the wax to harden completely, which typically takes several hours. Avoid touching the surface until it has fully cooled, as this can smudge your designs.
Ensuring Durability
To ensure the longevity of your painted candles, handle them with care. Painted surfaces can be sensitive to scratches and rubbing, so it’s advisable to keep them out of high-traffic areas. When burning the candles, monitor them closely, and avoid leaving them unattended. If you notice any wax dripping onto surfaces, immediately extinguish the flame and clean up the excess.
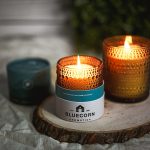
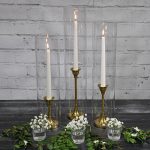
Displaying Your Painted Candles
Choosing the Right Location
Once your candles are complete and fully set, it’s time to showcase your handiwork. The right display can enhance the visual impact of your painted candles. Consider placing them on a decorative tray, mantelpiece, or dining table. Create height variations by using candle holders or stacking them on books.
Creating a Cohesive Look
To achieve a cohesive decor style, consider arranging your painted candles with complementary decor elements. Incorporating items like fresh flowers, greenery, or decorative stones can enhance the overall aesthetic. Additionally, using candles of varying sizes and designs can create an interesting visual dynamic, making your space feel more inviting and curated.
Caring for Your Painted Candles
Regular Maintenance Tips
Maintaining your painted candles is essential for preserving their beauty. Occasionally dust the candles with a soft cloth to remove any accumulated dust. Avoid using abrasive materials that could scratch the painted surface. If you notice any fading or chipping, consider reapplying wax paint to refresh the design.
Knowing When to Dispose of Candles
Like all candles, painted ones will eventually burn down. Keep an eye on the height of the candle and be mindful of safety as it approaches the end of its lifespan. When it’s time to part with a candle, do so responsibly by recycling or repurposing the leftover wax.
Conclusion: The Joy of Candle Painting
Celebrating Your Creative Accomplishments
Painting candles is a delightful and rewarding project that allows for self-expression while enhancing your decor. Whether you’re decorating for yourself or creating handmade gifts for loved ones, the process is enjoyable and fulfilling. Each painted candle reflects your unique style, turning ordinary items into extraordinary pieces.
Encouragement to Explore Further
Once you’ve mastered the art of candle painting, consider exploring other DIY projects that utilize similar techniques. From painting other home decor items to experimenting with different mediums, the skills you’ve gained will serve you well in your future creative endeavors. Embrace the joy of crafting and continue transforming your decor with your newfound talents!