Introduction to DIY Halloween Candles
Creating your own Halloween candles can be a wonderful way to add a personal touch to your festive decorations. Engaging in DIY projects not only ignites creativity but also allows for the incorporation of unique elements that reflect individual style. Making candles yourself offers an enjoyable experience that can be shared with friends and family, adding to the excitement of the holiday season. As we approach the eerie celebrations, consider crafting your own spooky candles to enhance the ambiance of your Halloween decor.
Importance of Homemade Decorations
Homemade decorations hold a special charm that store-bought ones often lack. They present a chance to showcase your inventiveness and give a piece of yourself to the holiday display. DIY Halloween candles, for instance, can be tailored to match your home’s theme, from sinister silhouettes to light-hearted pumpkin faces. By creating your own decor, you also partake in sustainable practices, repurposing materials that might otherwise be discarded. The act of making unique, handmade items fosters a sense of accomplishment and adds a distinctive flair to your Halloween festivities.
Choosing Your Materials
Before diving into your DIY Halloween candle project, it’s vital to pick the right materials. Your choices lay the foundation for the craft’s success.
Essential Supplies for Halloween Candles
To start, outline the basic items:
- Wax, such as soy or paraffin, suitable for candle making.
- Wicks that hold a flame and burn evenly.
- Molds or containers to give your candles shape.
- Dyes or paints to add spooky colors to your creations.
- Fragrance oils for that Halloween scent, like pumpkin spice or smoky wood.
Remember, the quality of your materials can make a big difference.
Recycling and Repurposing Items
Now, let’s talk sustainability. Look for items at home to reuse:
- Old candles that can be melted down.
- Jars, tins, or teacups for unique molds.
- Cardboard tubes for crafting pillar-like candles.
Repurposing reduces waste and adds a meaningful twist to your decor. In the spirit of the holiday, even household items can be transformed into something hauntingly beautiful.
Step-by-Step Guide to Making Cauldron Candles
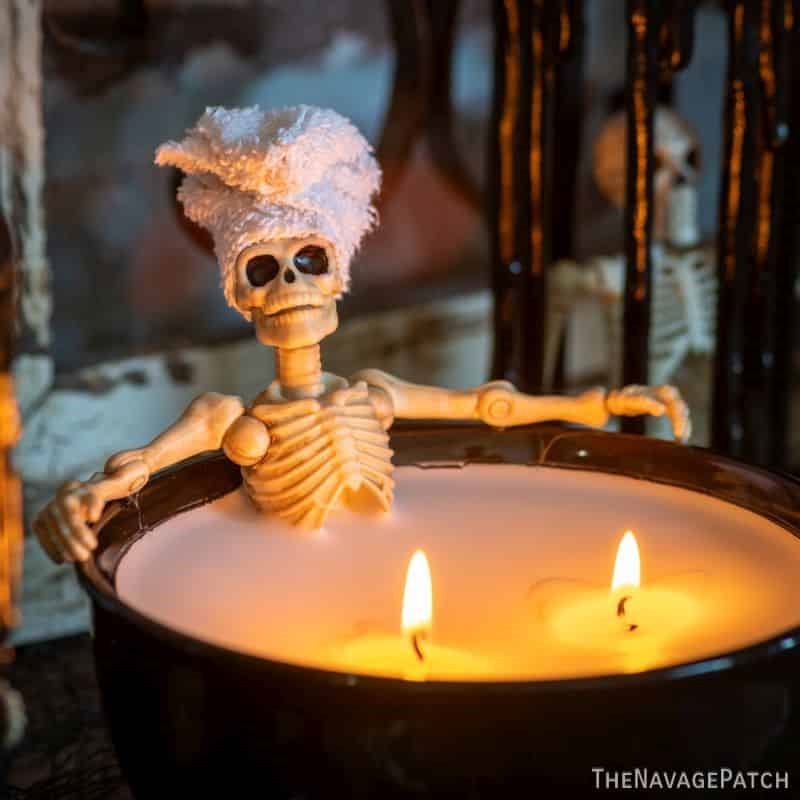
Creating a cauldron candle brings a magical touch to Halloween decor. Follow these steps for a spellbinding result.
Preparing Your Mold and Wax
Start with a ceramic cauldron; they’re often in stores during Halloween. Measure your soy wax flakes; you’ll need about double the cauldron’s volume. Secure a wick at the cauldron’s center with glue. Melt the wax using a double boiler method. Mix in your chosen Halloween fragrance oils and colorants for a spooky hue.
Assembling the Candle Decorations
Once the wax cools a bit, pour it into the cauldron. Make sure the wick stands straight. Use the molds made from putty or Halloween toys to craft wax skulls, bones, and bats. Heat the top layer of the candle lightly and place these decorations on the soft wax. Add a few green wax ‘bubbles’ for an overflowing brew effect. If you want eyes, drip white and black wax onto parchment paper to form them. To finish, carefully arrange all elements using a heat gun for quick adjustments.
Crafting Spooky Recycled Paper Roll Candles
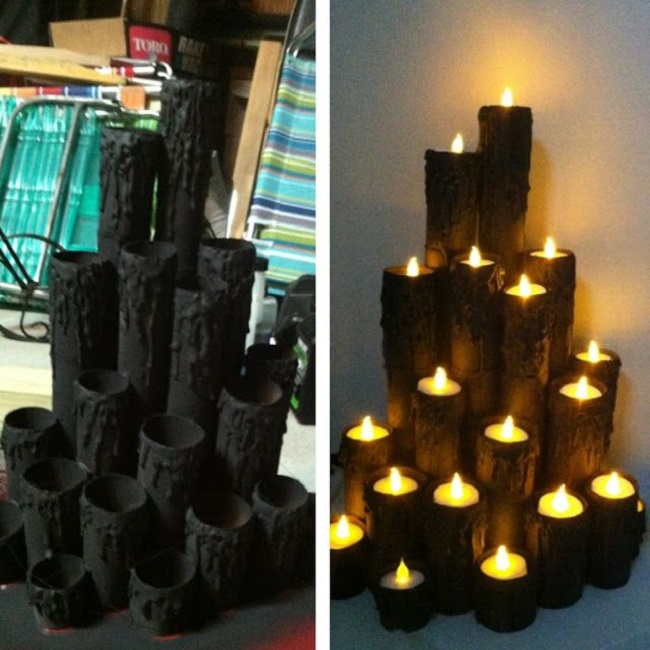
Transform paper rolls into eerie candles for a spook-tacular addition to your Halloween setup. This employs simple materials and channels creativity, making for an engaging DIY project. Let’s dive into how you can create this eco-friendly craft.
Creating the Wax Drips Effect
To make the wax drips, grab a hot glue gun. Start by squeezing glue at the top of each roll. Let it drip down the sides to mimic melting wax. Layer the glue until it looks like thick wax drips. You want an uneven, drippy look for an authentic candle effect. Once the glue cool, it will resemble solid wax.
Painting and Final Touches
When glue drips dry, paint everything black. Use matte black spray paint for a ghostly look. Spray evenly to cover both rolls and glue. Ensure you work in a ventilated space. Let the paint dry well. All components should look like a single piece. After drying, place a faux flickering tea light on top. You may fill the tops with a bit of foil to support the lights. The flickering lights will give the illusion of real candles. This DIY candle project offers a fun way to recycle and creates an amazing Halloween atmosphere. Enjoy crafting and have a happy Halloween!
Decorative Tips for Displaying Your Candles
Once you’ve crafted your DIY Halloween candles, the next step is creating a captivating display. Decorative finesse will enhance the spooky charm of your handmade creations. Use these tips to design a display that’s both eerie and enchanting.
Setting Up a Haunted Scene
To set up a haunted scene, choose a focal point in your space. A mantel or windowsill works great. Arrange your cauldron candles and paper roll candles at varying heights. This gives depth to your scene. Add cobwebs, spiders, or small Halloween figurines to amplify the spooky factor. Use dim lighting to make the candles’ glow stand out. Try positioning a mirror behind the candles to reflect the flickering lights and enlarge the display.
Combining Candles with Other Halloween Decor
Your DIY candles will look even spookier with the right company. Pair them with carved pumpkins, stacks of old books, or antique bottles for a witchy vibe. Scatter fallen leaves around for an autumnal touch. If you have paper roll candles, mix them with faux skulls or potion bottles for a creepy laboratory look. Remember, less is more. Choose a few key pieces to complement your candles without overcrowding them. Your DIY Halloween candles should be the stars of the show.
Safety Tips for DIY Candle Making
Safety is key when crafting your own Halloween candles. Here’s how to handle hot materials and ensure safe burning.
Handling Hot Materials
When making DIY Halloween candles, you’ll work with hot wax and glue. Protect your hands with gloves. Use a heat-resistant surface to catch drips or spills. Never leave hot materials unattended. To avoid burns, let the wax and glue cool before touching.
Placement and Burning of DIY Candles
Place finished candles on stable, heat-resistant surfaces. Keep them away from flammable objects like curtains. Never leave burning candles unwatched. Trim wicks to prevent long flames. Extinguish candles before they burn too low. Following these tips helps prevent accidents. Enjoy your spooky decorations safely!
More Halloween DIY Projects
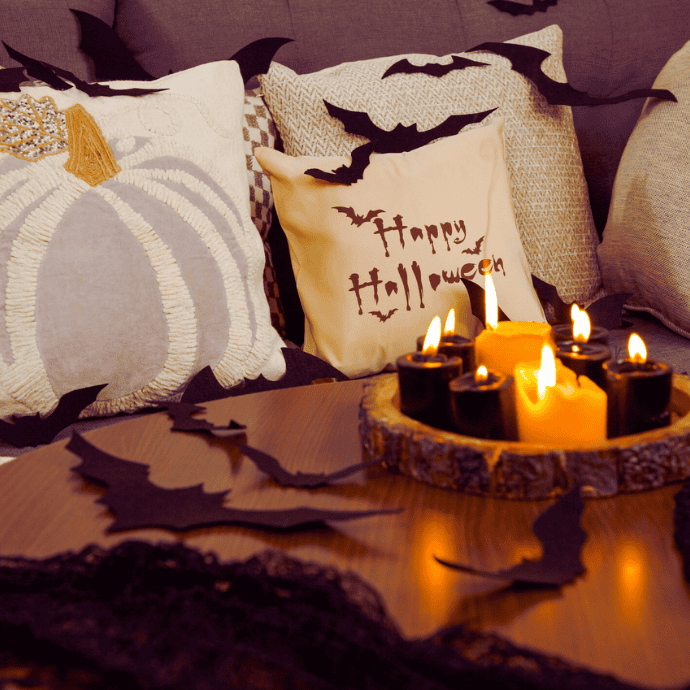
The joy of creating something unique doesn’t have to stop at candles. Halloween provides limitless opportunities to handcraft decorations, adding personal flair to spooky celebrations. Consider crafting ghostly garlands, eerie wreaths, or creating your own haunted house using cardboard. These projects let you experiment with various materials, from fabric scraps to old newspapers.
Expanding Beyond Candles
Once you’ve mastered the art of DIY Halloween candles, it’s time to broaden your crafting horizons. Try making:
- Spooky lanterns from jars and paint.
- Ghostly figures using balloons and cheesecloth.
- Customized tombstones from styrofoam.
- Sinister silhouettes for windows using black paper.
- Creepy spiders with pipe cleaners and pompoms.
These simple crafts can make your home the talk of the neighborhood and enhance the festive atmosphere.
Engaging the Whole Family in Halloween Crafts
Halloween crafts offer a wonderful chance for family bonding. Assign tasks based on age and skill level to get everyone involved. Young children might enjoy painting pumpkins, while teens and adults can take on more complex projects like sewing costumes or building props. Here are more ideas:
- Carving jack-o’-lanterns as a group.
- Making a family scarecrow using old clothes.
- Creating paper masks for a family photo shoot.
- Building a spooky gingerbread house.
Working on these activities together can create lasting memories and teach valuable skills. Encourage creativity, and have a memorable and crafty Halloween!
