Introduction to DIY Painted Candles
Painting candles can transform a simple wax column into a decorative piece. This DIY project is perfect for adding a personal touch to your home or creating unique gifts. The process is simple, affordable, and offers room for creativity. Whether you’re decorating for a specific season or just want to add some color to your space, DIY painted candles can be a wonderful addition. Not only does this craft allow for artistic expression, but it also can be a very relaxing hobby. In this guide, you will learn what supplies are needed, step-by-step painting instructions, and some tips to enhance your candle crafting experience.
Essential Supplies Needed for Painting Candles
Embarking on a candle painting project requires certain supplies. Gather these before you begin to ensure a smooth and enjoyable crafting experience.
Choosing the Right Candles
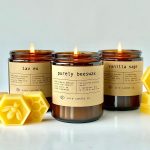
Start with selecting proper candles. Pillar or taper candles work best because they provide a smooth surface for painting. Avoid scented candles as the added oils can affect the paint adherence. Also, look for candles with minimal texture.
Selecting Non-Toxic Paints
The safety of paints is crucial. Choose non-toxic acrylic paints for your project. These are safe to use on candles and come in various colors. Always paint away from the wick to prevent toxic fumes when burning.
Other Necessary Tools
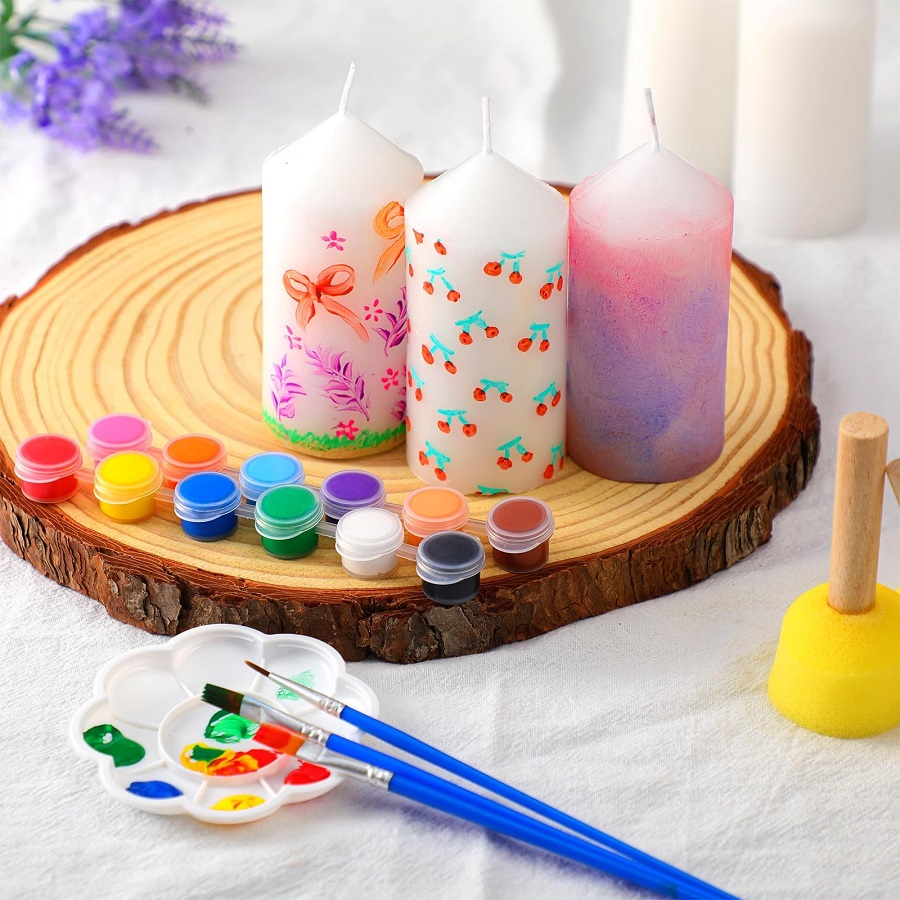
Apart from candles and paints, you will need a few more tools:
- A fine-tipped paintbrush allows for detailed work on candles.
- Candle holders to keep the candle upright while painting and drying.
- Markers or pencils may be used to dot out designs before painting.
- A clean cloth or wipes are handy for correcting mistakes quickly.
With these items ready, you can start transferring your creative designs onto candles.
Step-by-Step Guide to Painting Candles
Preparing Your Candles
The first step is simple – get your candles ready. Start by removing all packaging materials and stickers. If stickers leave residue, gently rub them away with a clean cloth. Make sure the candle surface is smooth and clean. This helps your paint adhere better and ensures a neat appearance.
Mapping Out Your Design
Next, plan your design. You can freehand your painting, or for more precision, use a pencil or marker to dot out where you want your design to be. This can help keep patterns consistent, especially if you’re painting multiple candles. Little dots or light marks can guide you while you paint, but are easy to cover up later.
The Painting Process
Now, it’s time to paint. Begin with any large elements of your design, like lines or shapes. Once the base of your design is down, add in the smaller details. Use a fine-tipped brush for accuracy. Work slowly and take your time to fill in the design. Once done, place the candle in a holder and let it dry completely. If you make a mistake, quickly wipe it off with a cloth. If the paint dries, gently scrape it off with your fingernail.
By following these steps, you can turn an ordinary candle into a personalized piece of art. Remember to let your candles dry thoroughly before handling or lighting them.
Candle Painting Techniques and Tips
Enhance your DIY candle painting with techniques that ensure precision and beauty. An enjoyable crafting session combines skill with the right approaches.
Using Fine Tip Brushes
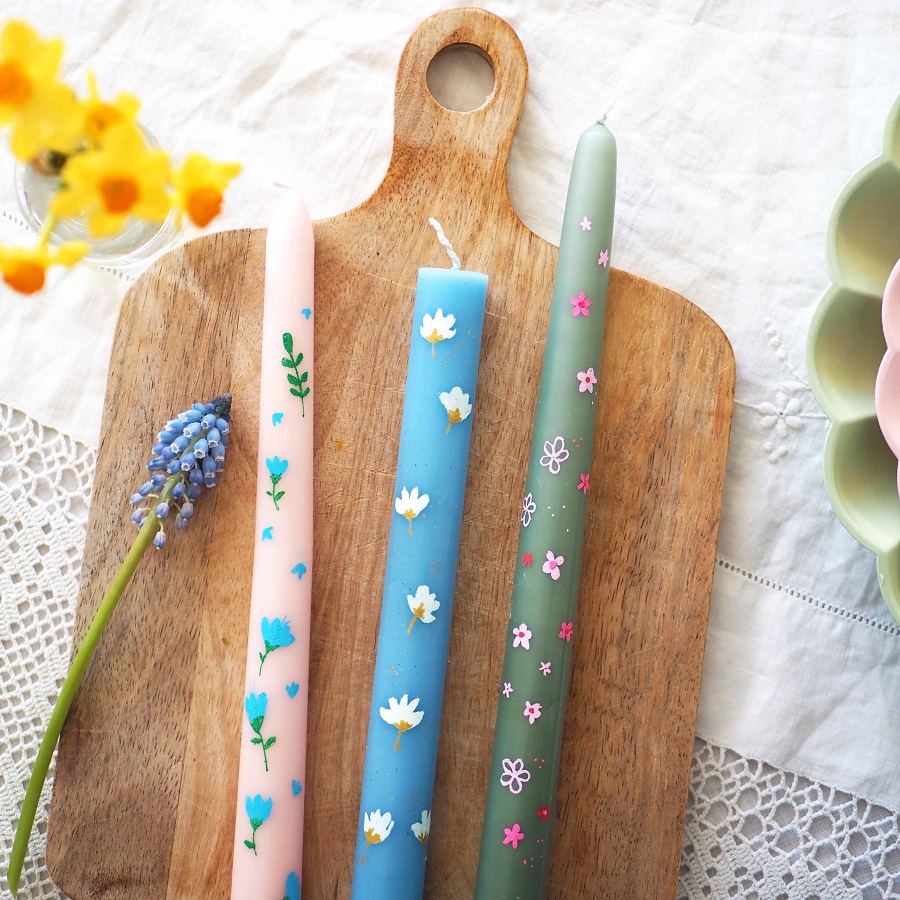
Choose fine tip brushes for intricate designs and crisp lines. These brushes offer control on the candle’s curved surface. For taper candles, fine tips are especially important. They help to keep your paint strokes neat and your design intact. Dip the brush lightly in paint and apply with gentle, steady strokes.
Painting and Drying Techniques
Apply paint in thin layers to avoid drips and uneven textures. Start with broad strokes for the base design, then add details. After painting, set your candles in holders to dry. This prevents smudging and keeps the design flawless. Allow enough drying time before handling. If you’re layering colors, make sure each layer is dry before applying the next one.
Correcting Mistakes
Mistakes happen, but they’re fixable. Quickly wipe away fresh mistakes with a cloth. If the paint has dried, gently scrape it off with a fingernail. For best results, keep wipes or a damp cloth on hand while you’re painting. Test paint on the candle’s underside if unsure about the color or technique.
By adopting these methods, your hand-painted candles will not only look professional but also express your creative vision accurately.

Seasonal Candle Painting Ideas
Embrace the changing seasons with unique candle designs. Seasonal motifs bring warmth and celebration into any home. Below are ideas to inspire your next crafting session.
Fall Theme Designs
Fall offers rich inspiration for painting candles. Think of warm colors like orange, red, and yellow. You can paint maple leaves, pumpkins, or harvest motifs. Simple vine patterns or block prints also work well. Add a touch of elegance with golden hues to mimic autumn’s glow. These designs create a cozy atmosphere, perfect for fall gatherings.
Winter Holiday Motifs
Winter holidays call for festive candle designs. You can paint Christmas trees, snowflakes, or holly berries. Use colors like red, green, and white to reflect the season. Consider adding silver or gold for a touch of sparkle. These candles are great for decorating or as holiday gifts. Patterns like stars or stripes in holiday colors also enhance the festive mood.
By incorporating these seasonal designs, your painted candles can celebrate the essence of each season. Remember to let your creativity shine through each brushstroke.
Safety Tips for Painted Candles
Ensuring safety when painting candles is crucial, both during the crafting process and when using them later. Below are critical safety tips to consider when engaging in this creative project.
Keeping Paint Away from the Wick
The proximity of paint to the wick is a key safety concern. To reduce risks:
- Paint at least half an inch away from the top of the candle.
- Avoid painting the wick at all costs; it could affect how the candle burns.
- If paint gets on the wick, remove it before lighting the candle.
This ensures the flame can burn cleanly and safely without any paint interference.
Checking Paint Toxicity
Using the right paint is essential for safety. Always choose non-toxic paints specifically designed for candles. Before buying paint:
- Look for labels indicating ‘non-toxic’ or ‘safe for use on candles.’
- Consult with a store associate if you have questions about paint safety.
- Research the paint brand online to ensure it’s reputable and safe.
By ensuring the paint is non-toxic, you create a safer environment for yourself and anyone who enjoys your candles.
Crafting as a Relaxing Activity
Crafting can be a calm and soothing pastime, especially during the autumn season. As we shift into fall, the cooler weather and changing leaves inspire many to nestle indoors and engage in creative projects. Painting candles is just one way to unwind and express your creativity; it’s a process that allows you to slow down and focus on the simple pleasure of making something beautiful.
Other Cozy Crafting Ideas for Fall
If you love the idea of cozy crafting, consider these fall projects:
- Pumpkin Flower Arrangements: Create stunning centerpieces using pumpkins as vases filled with autumnal flowers.
- Fall Printables: Design or color printables that capture the essence of fall, perfect for framed art or card making.
- Leaf Luminaries: Craft these by collecting colorful fall leaves and attaching them to jars or vases to create a warm glow.
- Knitted Scarves or Blankets: Knit or crochet snug scarves and blankets in fall colors to keep you warm as the temperatures drop.
- Homemade Wreaths: Gather pinecones, acorns, and branches to make a natural wreath for your door.
Each of these crafts can bring joy and a sense of calm during the cooler months. Plus, they also make thoughtful handmade gifts. Remember to keep your crafting simple, enjoyable, and stress-free for the best experience.