Essential Supplies for DIY Candle Painting
To start painting candles, gather all necessary supplies. This step ensures a smooth creative process.
Choosing the Right Paint
For safe candle painting, use non-toxic acrylic paint. Keep paint away from the candle’s wick to avoid burning it. Choose colors that suit your theme, but think of the candle color too. Neutral paint lets the candle’s color shine. Festive times call for brighter colors. Always do a patch test under the candle first.
Selecting Candles and Brushes
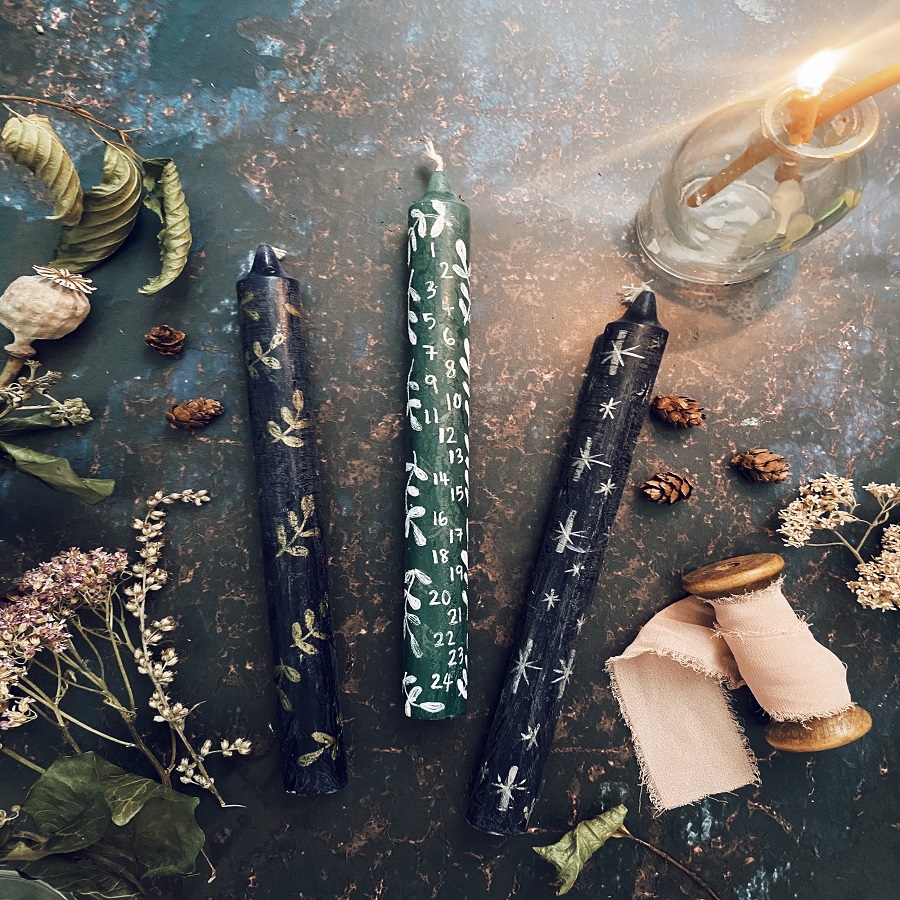
Go for candles that fit your project well. Taper candles are great for delicate work. Pillar candles give more space for designs. Buy candles with smooth surfaces for easy painting. Fine tip brushes are best for details on round candles. Sturdier brushes can paint thicker lines. Have some candle holders ready. They hold the candles while the paint dries. Remember, gather all supplies before you begin for the best experience.
Basic Techniques for Painting Candles
Before diving into the fun part, we must cover the basics.
Preparing Your Candles: Cleaning and Priming
Cleaning candles is key for paint adhesion. Start by removing any labels or residue. A soft cloth can gently wipe the surface clean. Next, prime if needed. Some prefer a light sanding to help paint stick better. Make sure the candles are dust-free before painting.
Applying Base Colors and Simple Patterns
Now, apply your base color. Can you paint candles directly? Yes! Just make sure it’s non-toxic acrylic paint. For simple patterns, use low-tack tape or stencils. Begin with larger shapes first. Then fill in with smaller details. Let each layer dry before adding new colors or patterns. Keep designs simple at first and have fun!
Advanced Candle Painting Techniques
As you become more comfortable with candle painting, experimenting with various paint types can elevate your projects.
Incorporating Different Paint Types
Can you paint candles with something other than acrylics? Absolutely! Try using oil paints for a glossy finish or watercolors for a translucent effect. Remember, safety first – ensure these paints are non-toxic as well. Always let paint dry completely before lighting the candle.
Experimenting with Textures and Layers
Adding texture to your designs can create a stunning 3D effect. Use a thicker layer of paint or add materials like sand or glitter. Layering colors adds depth. Start with a dark shade and gradually add lighter tones on top. With each new layer, give time for the previous one to dry. It keeps colors from blending unintentionally.
Seasonal and Themed Candle Designs
Candle painting is perfect for celebrating seasons and events. Let’s get creative with themed designs.
Festive Designs for Holidays
Holidays inspire unique candle art. For Christmas, paint with reds, greens, and golds. Think holly, berries, or snowflake patterns. Halloween? Go for oranges, purples, and blacks with spooky themes. Can you paint candles with Easter in mind? Absolutely. Use pastels and bunny or egg motifs. For each holiday, pick designs that bring out the joy and spirit of the occasion.
Matching Candle Designs to Home Decor
Your home’s style can guide your candle painting. Modern decor? Use geometric patterns and bold colors. More rustic? Try warm tones and nature-inspired designs. These candles can complement room color schemes or add accent touches. Paint small, consistent patterns to blend in. Or, make a statement with a large, eye-catching design.
Creating Functional Art with Painted Candles
Painted candles can serve both as beautiful decor and practical lighting. By adding a personal artistic touch to these objects, they become more than just a source of light; they embody your creativity and can reflect the themes and colors of your living space or a particular season. Whether displayed on a mantelpiece, arranged on a dining table, or given as thoughtful gifts, these functional art pieces add warmth and personality to any setting.
Tips on Preserving Painted Candles
To ensure your painted candles last, follow these tips:
- Store them in a cool, dark place to prevent the paint from fading.
- Avoid placing them in direct sunlight as it can cause the wax to warp and the colors to fade.
- When not in use, wrap the candles in tissue paper to protect the painted surface from dust.
- Keep them upright to avoid bending or damage to the painted designs.
- Properly caring for your candles will help preserve both their appearance and functionality.
Safety Considerations in Candle Painting
When painting candles, safety is a top priority. Here are key points to remember:
- Always use non-toxic paints to avoid harmful fumes when burning the candles.
- Keep the paint away from the wick. Paint on the wick can cause it to burn unpredictably.
- Test your design on the bottom of the candle first to see how the paint behaves.
- Let painted candles dry completely before lighting them to prevent any fire hazards.
- Never leave lit candles unattended and always use a proper candle holder.
Painted candles are easy to make and bring joy, but always prioritize safety in both the creation and use of your DIY candle art.

Step-by-Step Projects to Get Started
Now that you’re equipped with the essentials, it’s time to dive into crafting your own candle masterpieces.
Simple Floral and Heart Patterns
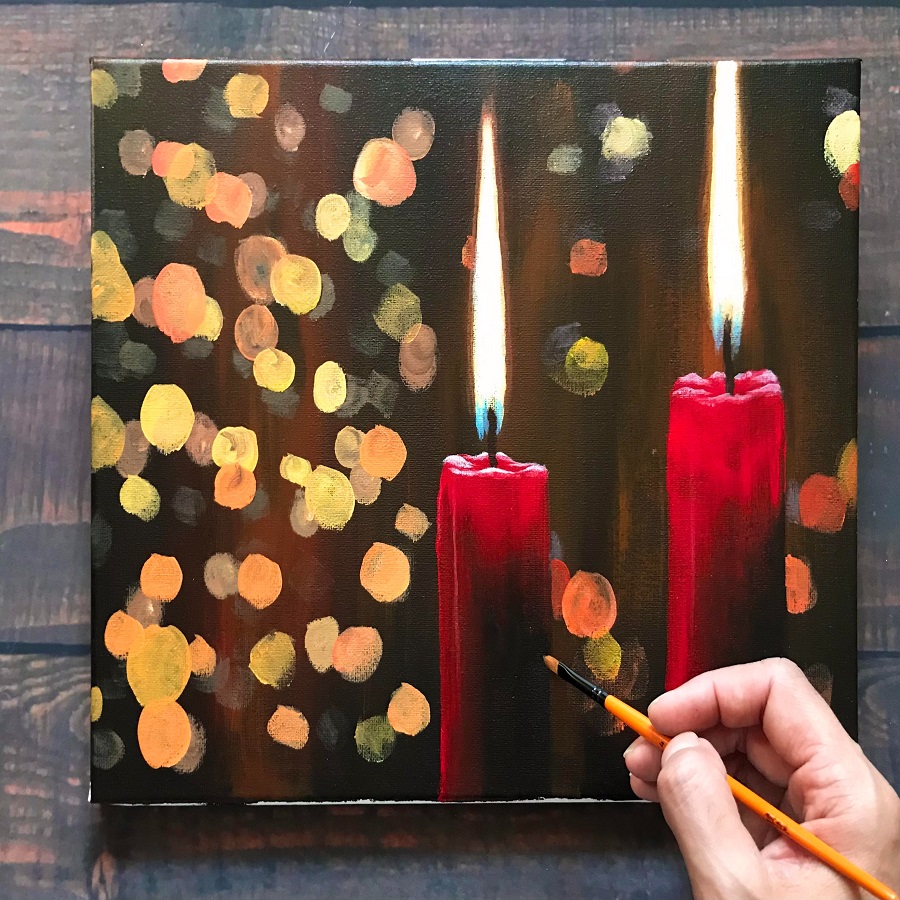
Creating simple floral and heart patterns on candles is a beginner-friendly project. Start by choosing vibrant paint colors for your flowers and a rich red for the hearts. With a fine-tip brush, paint small petals in a circular pattern to form flowers. For the hearts, paint two diagonal lines that meet at the bottom. These designs are perfect for adding a personal touch to your living space or as handmade gifts.
Remember to let the paint dry before lighting the candles. Always do a test painting on the candle’s base to see how the colors look. Painting simple patterns is a fun way to practice your skills before moving on to more complex designs.
Crafting Detailed Foliage and Wax Prints
Once you’re comfortable with simpler designs, challenge yourself with detailed foliage and wax prints. Melt different colored wax and use a fine paintbrush to apply it onto the candle. Create leafy patterns or intricate wax prints by layering the wax. This technique requires a steady hand and a bit of patience.
To add depth, use lighter and darker shades of green for the foliage. For wax prints, play with color contrasts and textures. Make sure to work quickly as the wax sets fast. Don’t worry about mistakes, you can easily scrape off the wax and try again.
By following these steps, you’ll be able to craft beautiful and unique candles. Whether you’re decorating for a season, a special occasion, or just for fun, these DIY projects are sure to bring a personalized flair to any candle.