Candle making is a delightful and creative hobby that not only allows you to produce beautiful decorative pieces but also provides an opportunity to personalize your space with lovely scents. In this comprehensive guide, we’ll explore the art of candle crafting, covering everything from the essential materials and tools to the various techniques for creating stunning candles at home.
Understanding the Basics of Candle Making
What is Candle Making?
Candle making is the process of creating candles using wax, wicks, and various additives like fragrances and colors. The basic principle involves melting the wax, pouring it into a mold or container, and adding a wick. Once the wax cools and solidifies, you’re left with a candle that can be used for ambiance, decoration, or aromatherapy. Candle making has a rich history, dating back thousands of years, and today it’s enjoyed by hobbyists and artisans alike.
Why Make Your Own Candles?
Making candles from scratch offers numerous advantages. Firstly, you can customize candles to suit your preferences in scent, color, and design. This personalization makes your candles unique and can serve as thoughtful gifts for friends and family. Additionally, homemade candles are often more environmentally friendly than mass-produced options, especially when using natural waxes like soy or beeswax. Lastly, the process can be incredibly relaxing and fulfilling, providing a creative outlet that many people find therapeutic.
Essential Materials for Candle Making
Types of Wax
The choice of wax is fundamental to candle making, as it influences the candle’s appearance, burn time, and scent throw. Common types of wax include paraffin, soy, beeswax, and palm wax.
- Paraffin Wax: This is the most commonly used wax for candles and is known for its excellent scent throw. However, it is a petroleum byproduct and may not be the best choice for eco-conscious crafters.
- Soy Wax: Made from soybean oil, soy wax is a popular choice for its natural properties. It burns cleanly and has a good scent throw, making it suitable for scented candles.
- Beeswax: Known for its natural honey scent, beeswax is the most natural option available. It burns longer than paraffin and soy wax and is often favored by those looking for an eco-friendly alternative.
- Palm Wax: This is derived from palm oil and is known for its unique crystalline appearance. Palm wax is a renewable resource but requires careful sourcing to ensure it is sustainable.
Choosing the Right Wick
The wick is crucial for ensuring your candle burns evenly and safely. Wicks come in various sizes and materials, including cotton, wood, and hemp. The size of the wick should correspond to the diameter of the candle; larger candles require thicker wicks to facilitate proper burning. When selecting wicks, consider the type of wax you are using, as some wicks work better with specific waxes.
Tools and Equipment Needed for Candle Crafting
Basic Candle Making Supplies
Before you start making candles, gather the essential tools and supplies. Here’s a basic list:
- Double Boiler: This is used to melt the wax safely, preventing it from overheating.
- Thermometer: An accurate thermometer helps monitor the wax temperature, ensuring optimal melting and pouring.
- Containers or Molds: Choose heat-resistant containers or molds in which to pour your melted wax. These can be glass jars, metal tins, or silicone molds.
- Stirring Utensils: Wooden or silicone spoons are ideal for mixing in fragrances or colors.
- Pouring Pitcher: A heat-resistant pitcher with a spout makes transferring melted wax easier and more precise.
Safety Gear
Safety should always be a priority when working with hot materials. Equip yourself with heat-resistant gloves and safety goggles to protect your skin and eyes from any splashes. A well-ventilated workspace is also crucial to avoid inhaling any fumes from the melting wax or added fragrances.
Preparing Your Workspace
Setting Up for Success
Creating a well-organized and safe workspace can enhance your candle-making experience. Start by covering your work surface with newspaper or a disposable tablecloth to catch any spills. Ensure that all your tools and materials are within reach to minimize disruptions during the process.
Cleaning Up
Keep a small container nearby for waste materials, such as used wicks and any leftover wax. After your candle-making session, allow your tools to cool before cleaning them. Wax can be stubborn, so using warm soapy water and a scraper can help remove residue effectively.
Step-by-Step Candle Making Process
Melting the Wax
The first step in making candles is to melt the wax. Use a double boiler setup to heat your wax gently. Fill the bottom pot with water and place it on the stove over medium heat. Once the water begins to simmer, add the wax to the top pot. Stir occasionally and monitor the temperature using a thermometer; most waxes should be melted to around 170-180°F (77-82°C) for optimal results.
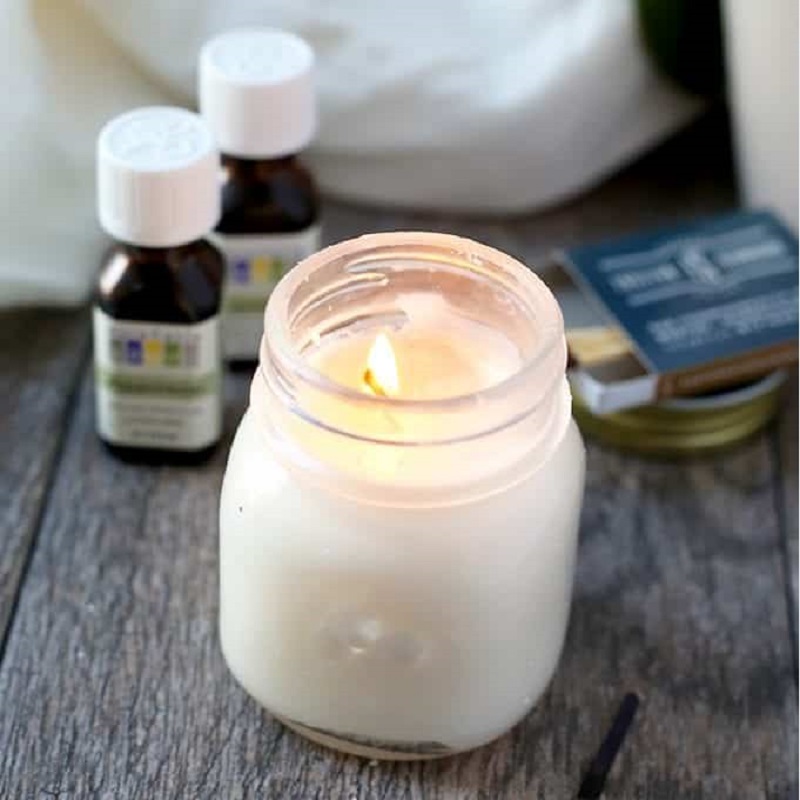
Adding Fragrance and Color
Once your wax is fully melted, it’s time to customize your candle with fragrance and color. If you’re adding essential oils or fragrance oils, pour them into the melted wax once it reaches around 170°F. A general guideline is to use 1 ounce of fragrance per pound of wax. For color, use candle dyes specifically designed for candle making, adding small amounts until you achieve the desired shade. Stir thoroughly to ensure an even distribution of color and scent.
Pouring the Wax
Preparing Your Containers
Before pouring, ensure that your containers or molds are clean and dry. If using glass jars, pre-warm them by placing them in a warm oven for a few minutes. This helps to prevent cracking from the sudden temperature change when the hot wax is poured in.
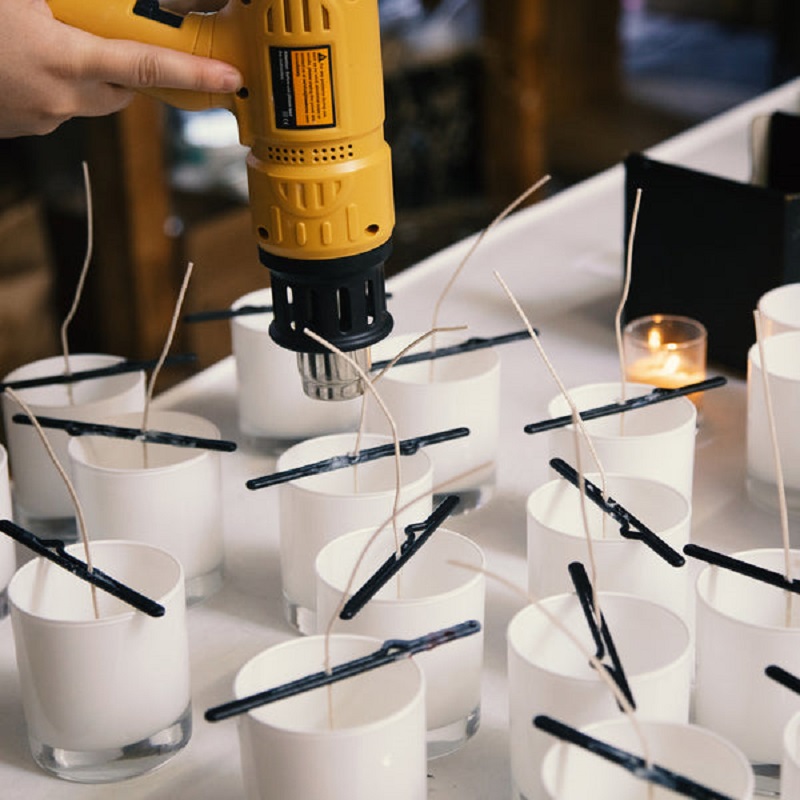
Securing the Wick
Position your wick in the center of the container or mold using a wick holder or a pencil to keep it straight. The wick should be anchored at the bottom and allowed to rise vertically through the wax.
Pouring Technique
Carefully pour the melted wax into your prepared container, leaving a small amount of wax in the pot for topping off later. Pour slowly to minimize air bubbles and ensure a smooth surface. Once filled, let the candle cool for a few hours until solid.
Finishing Touches
Topping Off
After the candle has cooled and solidified, you may notice some uneven surfaces or sinkholes around the wick. If this occurs, reheat the remaining wax and pour it gently over the top to create a smooth, even finish.
Trimming the Wick
Once your candle has fully set and cooled, trim the wick to about ¼ inch above the wax surface. A properly trimmed wick prevents excessive smoke and helps the candle burn evenly.
Scenting and Designing Your Candles
Creating Unique Scents
Experimenting with different fragrance combinations can lead to unique and delightful candles. Consider blending complementary scents, such as vanilla and sandalwood or citrus and mint, to create a signature aroma. Keep in mind that some essential oils are stronger than others, so balance is key when mixing fragrances.
Decorating Your Candles
Personalizing your candles extends beyond scent; you can also decorate them for a more attractive presentation. Consider using decorative jars, adding labels, or embedding dried flowers or herbs in the wax for a visually appealing touch.
Troubleshooting Common Candle-Making Issues
Addressing Common Problems
Even experienced candle makers encounter issues from time to time. Some common problems include:
- Uneven Burn: This can happen if the wick is too small or positioned incorrectly. Ensure your wick is appropriate for the size of your candle.
- Frosting: This is a common occurrence with soy wax. It can be minimized by properly melting and pouring the wax at the correct temperatures.
- Weak Scent Throw: If your candles lack fragrance, consider increasing the amount of fragrance oil or ensuring it’s mixed thoroughly with the wax.
Learning from Mistakes
Mistakes are part of the learning process in candle making. Keep notes on your experiments, including wax types, scents, and any adjustments you make. This will help you refine your techniques and develop your skills over time.
Advanced Candle Crafting Techniques
Layering Colors
For a visually stunning effect, consider layering different colors of wax in your candles. Pour one color and allow it to cool slightly before adding another layer. This technique can create beautiful ombre effects or distinct color sections.
Embedding Objects
For a creative twist, you can embed objects like dried flowers, beads, or small ornaments in your candles. Just ensure that the objects are heat-resistant and won’t release any harmful substances when heated. This adds a unique aesthetic to your finished product.
Storing and Caring for Your Candles
Proper Storage Techniques
To keep your candles in optimal condition, store them in a cool, dark place away from direct sunlight. This helps to prevent fading of colors and deterioration of scents. Avoid stacking candles on top of one another to prevent damage to their surfaces.
Caring for Your Candles
To extend the life of your candles, burn them properly. Allow them to burn long enough for the wax to melt evenly across the surface, which helps prevent tunneling. Always trim the wick before each use to ensure a clean and efficient burn.
Conclusion: Embrace Your Candle Crafting Journey
Candle crafting is a rewarding and enjoyable hobby that can lead to beautiful creations and delightful scents for your home. By following the steps outlined in this guide, you’ll be well on your way to becoming a proficient candle maker. Remember that practice makes perfect; don’t hesitate to experiment with different waxes, fragrances, and techniques to find what works best for you. So gather your materials, set up your workspace, and let your creativity shine as you embark